
So, you have bought a domain name in Namecheap and would like to set it up with blogger? Let's dig in!

Step 1:
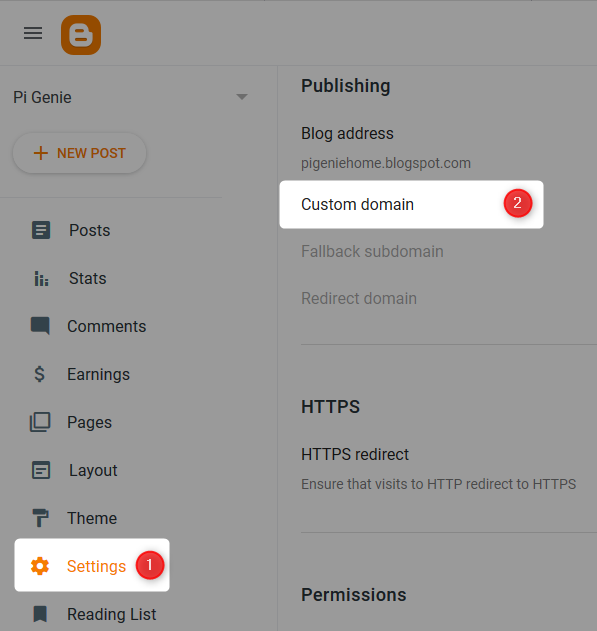
First we need to figure out some details from blogger which we need to enter in NameCheap. For this, lets go to Blogger Settings and click on Custom Domain.
Step 2:
Enter your domain name (www.pigenie.com) or sub domain name (blog.pigenie.com) and click Save. You will get an error which has the details on the two C-Records that needs to be entered in Namecheap.
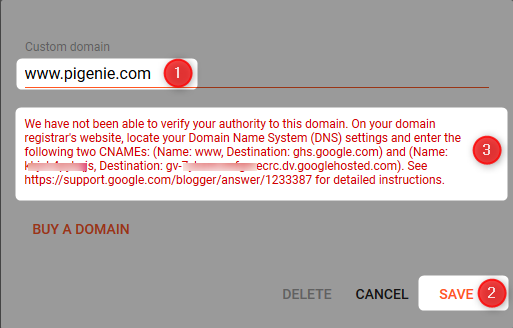
You will not be able to save this till those details are entered in Namecheap, so lets get to that and then come back here. 😀
Step 3:
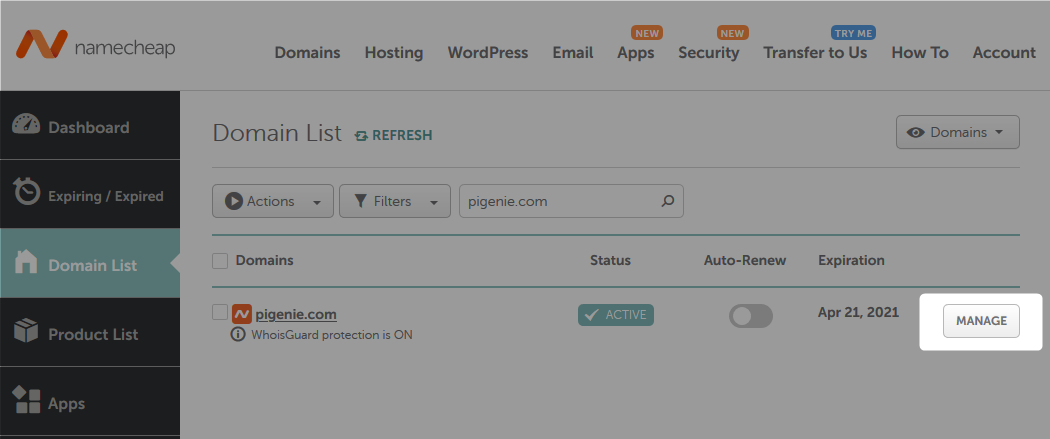
Go to Namecheap and click on the "Manage" button for your domain name.
Step 4:
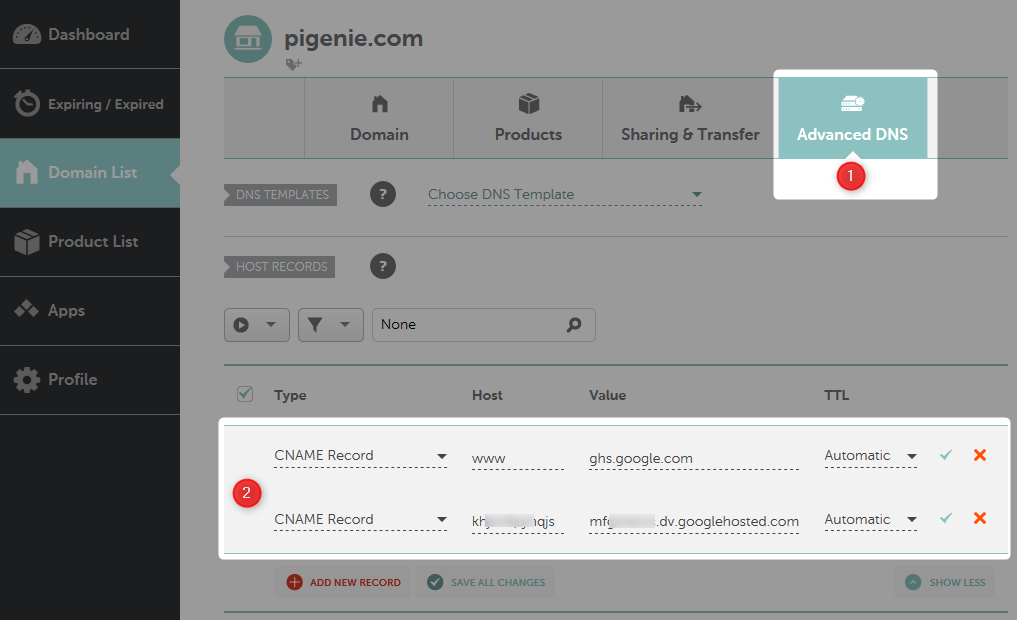
Go to AdvancedDNS and add the two C-Records that was prompted by blogger here. The host name for the ghs.google.com C-Name record will be www if its the main domain or it will be the sub-domain name.
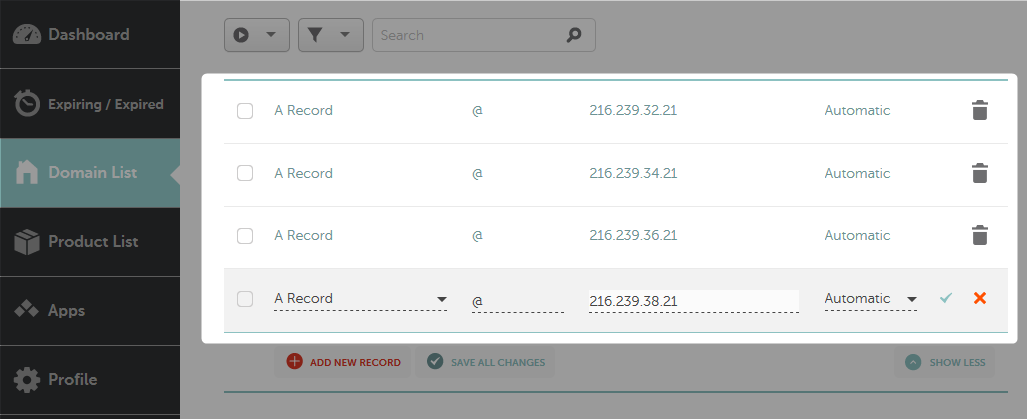
Step 5:
Similarly add below four A-Records in the DNS to make it point to Blogger.
- 216.239.32.21
- 216.239.34.21
- 216.239.36.21
- 216.239.38.21
Step 6:
Now wait for an hour for the DNS to get reflected. Now go to Blogger Settings, click on Custom Domain, specify your domain name and click Save.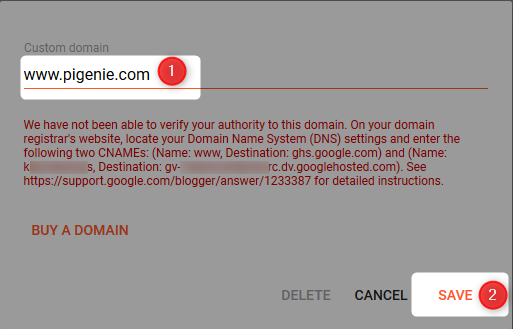
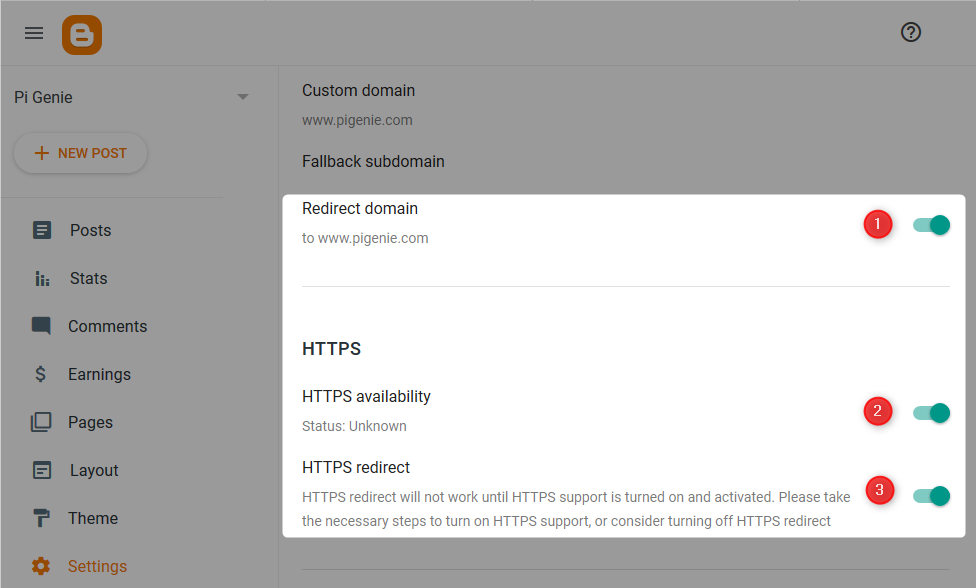
Step 7:
Enable redirect non-www domain address to www domain address. Enable HTTPS and redirection of HTTP to HTTPS.
Hurray! All Done 😎
Facing any issues or have any questions? Just drop them in the comments and I will be glad to help.
No comments:
Feel free to leave a piece of your mind.